Instructions regarding designing box set ups on design grid
- All horizontal lines are the tops and bottoms of the boxes
- The vertical red and dotted lines signify where the pin holes are located
- For wider than 2875mm set ups, just add more design grid sheets
- The bottom 250mm signifies pedestals which are a maximum of 250mm high and can be reduced to 150mm if so required-widths of the pedestals can be from 250mm and increased by increments of 125mm up to a maximum of 1500mm- any wider requires two plints. Depths can be made to suit 200/300/400mm deep boxes
- Plints can be from 50mm high to 150mm high and can be from 250mm wide and increased by increments of 125mm up to a maximum of 1500mm- any wider requires two plints. Depths can be made to suit 200/300/400mm deep boxes
- All pedestals and plints have pinholes to match the boxes
- The distance behind pedestals and plints is 40mm to allow for skirting board and cables
- Box set ups can also sit directly on the floor without using pedestals or plints
- To start your set up design measure the width and height of your space and mark it out on the design grid
- If you are placing the boxes on the floor start your design on the bottom of the grid
- If you are using a plint add on your required height plint to your overall height of box set ups to give you your finished set up height
- By using wide boxes on your first row it will give you stability to build your set up
- Then place the boxes in your required design
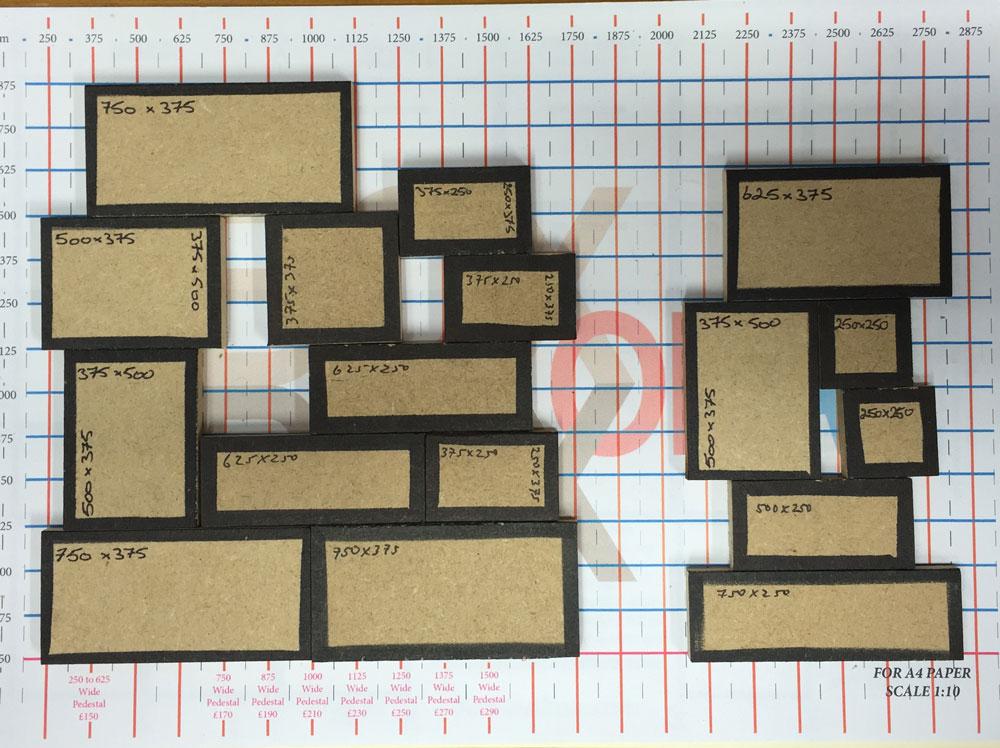
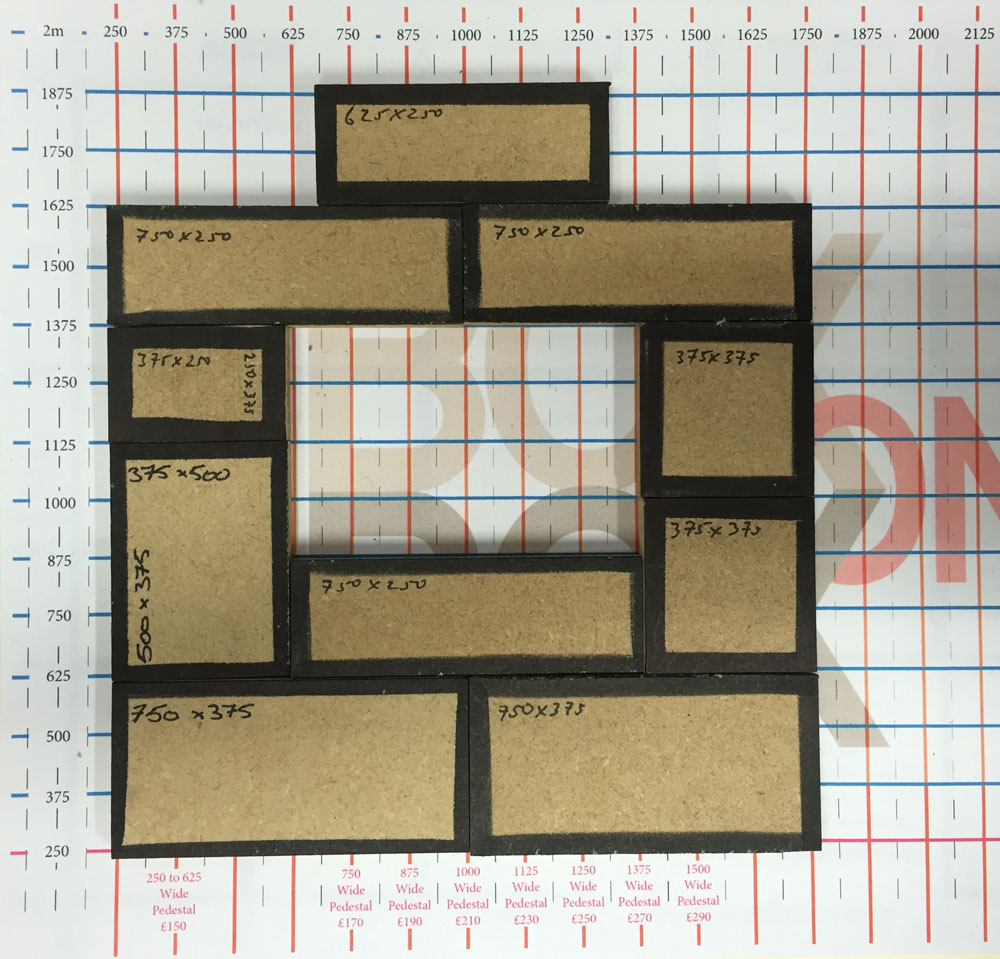
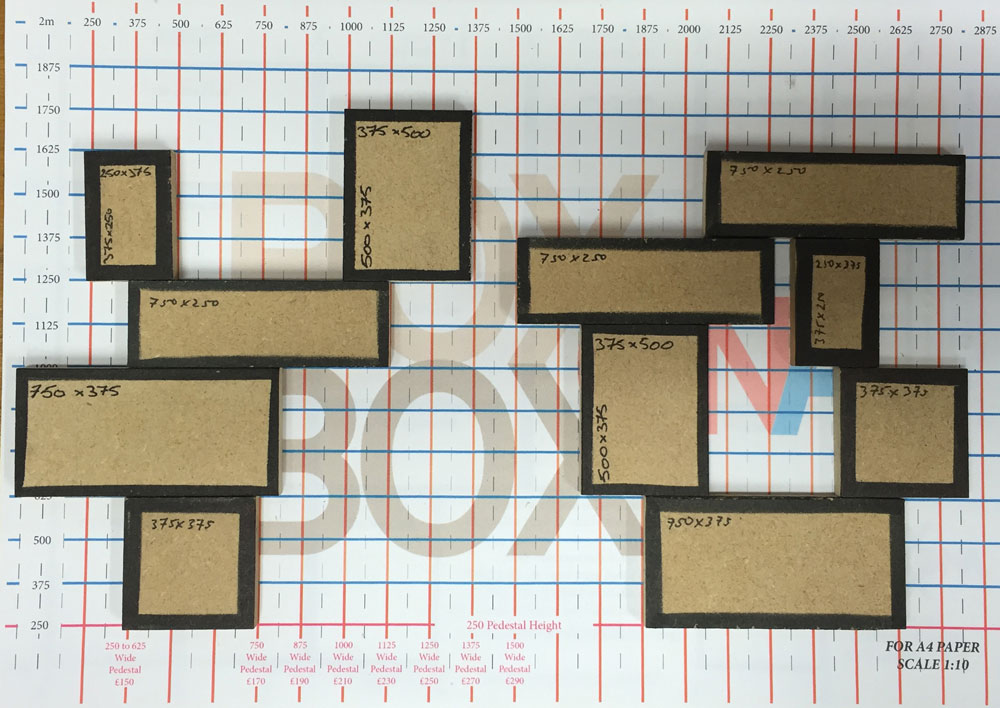
- Use the image provided as an example of how far you can overhang the boxes
- The max overhang is 1 pin hole visible on the underside of the box
- Each box should be overlapped by another box by at least one pin connection above the box- see images
- The maximum overhang on each side of the set up should not exceed the bottom box by more than 125mm- see images
- Do not start your set up with shallow boxes on the bottom and then place deeper boxes on top of these as this will affect the stability of the set up
- Do not put timber/glass doors or drawers on the top row of boxes
- Boxes that are 500/625/750mm wide require two doors. Boxes that are 250/375mm wide require one door. Drawers can be put in any width box that is 250mm high
- Wall brackets can be added to any box- 300/400mm deep boxes need two brackets on either side. It is advised that the walls are suitable to carry the weight of the boxes and what you place in them- wall boxes can be mounted in any configuration that you require
- When you have your design set up done, write the depth of box on each of the miniature boxes and also indicate where you would like timber/glass doors or drawers and which timber you would like then take a picture of the design, email it to us and we will have a look at it and we might make some suggestions
- Prices can be calculated from the enclosed brochure- minus your show discount